2012年12月30日日曜日
Raspberry Piを手に入れて、まあ、普通にSDカードを作って、立ち上がってそのままにしてたんだけど、冬休みになって、色々さわってみました。その中で、やはり凄いと感じたのは「XBMC」です。これが、数千円で動くのですから驚きです!


リブートし、RASPBMCが立ち上がり、ロゴも変わります!


めでたく、XBMCが立ち上がりました!

Raspberry PiのXBMCの事をRASPBMCと言います。 http://www.raspbmc.com/
インストールはとても簡単で、Downloadのタグから、自分のOSにあったスクリプトコピペするだけどOKです。

私の場合はMacなので、四角で囲んだ部分をクリックし、OSXの部分をコンソールにコピペするだけです。
MacBook-Pro-2:~ Raspberry-PI himamura$ curl -O http://svn.stmlabs.com/svn/raspbmc/testing/installers/python/install.py
下線部を入力すると、直ぐにダウンロードが開始され下記のようになります。
% Total % Received % Xferd Average Speed Time Time Time Current
Dload Upload Total Spent Left Speed
100 13913 100 13913 0 0 10426 0 0:00:01 0:00:01 --:--:-- 22622
次に、スクリプトを実行できるようにし
MacBook-Pro-2:Raspberry-PI himamura$ chmod +x install.py
インストール用のスクリプトを実行します
MacBook-Pro-2:Raspberry-PI himamura$ sudo python install.py
Password:
Raspbmc installer for Linux and Mac OS X
http://raspbmc.com
----------------------------------------
Please ensure you've inserted your SD card, and press Enter to continue.
Enter the 'IDENTIFIER' of the device you would like imaged, from the following list:
#: TYPE NAME SIZE IDENTIFIER
1: EFI 209.7 MB disk0s1
2: Apple_HFS Macintosh HD 749.3 GB disk0s2
3: Apple_Boot Recovery HD 650.0 MB disk0s3
#: TYPE NAME SIZE IDENTIFIER
1: Windows_FAT_32 58.7 MB disk1s1
2: Linux 3.9 GB disk1s2
次に、インストールするSDカードの場所を聞いてくるので、刺してあるSDカードを指定します。
Enter your choice here (e.g. 'disk1s1'): disk1s1
It is your own responsibility to ensure there is no data loss! Please backup your system before imaging
You should also ensure you agree with the Raspbmc License Agreeement
良いか?と聞かれるので
Are you sure you want to install Raspbmc to '/dev/disk1s1' and accept the license agreement? [y/N] y
Downloading, please be patient...
Downloaded 15.79 of 15.79 MiB (100.00%)
しばらくするとダウンロードが終了し、SDカードに自動的に書き込まれます。
Unmounting the drive in preparation for writing...
Unmount of all volumes on disk1 was successful
Please wait while Raspbmc is installed to your SD card...
(This may take some time and no progress will be reported until it has finished.)
0+1174 records in
0+1174 records out
76800000 bytes transferred in 14.820558 secs (5181991 bytes/sec)
Installation complete.
Unmounting the drive in preparation for writing...
Unmount of all volumes on disk1 was successful
Mounting the drive for post-installation settings
Volume (null) on /dev/rdisk1s1 mounted
その後、自分の環境に合わせてY/Nを選びます。
Would you like to install Raspbmc to a USB stick - note this still requires an SD card to boot from [y/N] N
Would you like to configure networking manually? This is useful if you are configuring WiFi or a non-DHCP network [y/N] N
Unmounting the drive in preparation for writing...
Unmount of all volumes on disk1 was successful
Raspbmc is now ready to finish setup on your Pi, please insert the SD card with an active internet connection
MacBook-Pro-2:Raspberry-PI himamura$
プロンプトが出たらSDカードを抜き、Raspberry Piに差し込みブードさせます。
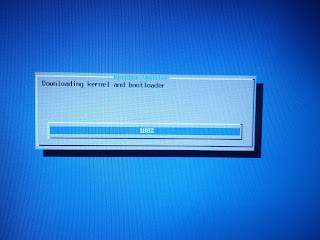
Raspberry Piでブートが始まると、XBMC本体のダウンロードが始まります。


リブートし、RASPBMCが立ち上がり、ロゴも変わります!


めでたく、XBMCが立ち上がりました!

しっかりと2Dアクセラレータも効いているようで、画面の動いは滑らかです。
登録:
投稿 (Atom)


